Baking Sourdoughs, Levain, and Wild Yeast, Day 2

Art2Day2dropbox-2

Same Formula, Different Amount, Hydration and Feeding  of Levains, Day #2

In today’s lesson, we will have the opportunity to compare breads with the following differences:

  1. one-day feeding versus two-day feeding levains,
  2.  liquid versus stiff levains, and
  3.  different amounts of levain in the final dough mix.

In lecture, Miyuki elaborates on the two types of bacteria involved in the sourdough process:

a)  homofermentative bacteria which favors high hydration and warm temperatures (describes liquid levain), and produces mostly lactic acid (sweeter flavor), and

2) heterofermentative bacteria which favors lower hydration and low temperatures (describes stiff levain), and produces both lactic and acetic acids as well as gas production.

A key difference is the growth rate, temperature and hydration.  The homofermentative bacteria which favor water and warmth  develops earlier. Also the characteristic of acetic acid in the starter takes longer to develop than lactic acid. Hence, the reasons why it takes one to two weeks for a balance of wild yeast and bacterias to develop which will contribute to the complex flavors derived from lactic/acid production.

On  a side note, the infamous Boudin sourdough uses stiff levain which is fed once a day and stored in 45-50F temperature.  Note the sharp acidity.  (NOTE: On my day off from SFBI, I took a tour of the Boudin Bakery (of course I did) and was impressed with the history of sourdough in San Francisco and equally impressed with the detailed, easy to understand explanation of sourdough and bread baking process to the general public.  The Boudin Bakery Tour warrants its own post. More on that later.

Additionally, Miyuki explained baker’s percentage using preferment. By deciding the percentage of levain in the final dough, we can determine the amount in Kg of the amount of preferment to make the previous day for the following day’s bake.

HANDS-ON / SKILLS TRAINING:

Day #2,  we started to feed the culture while increasing the water amount. The higher hydration is to promote enzyme activity so that there will be sufficient sugars (food) for the wild yeast to thrive. Art2Day2dropbox-30

Today, we mixed four different dough formulas in the mixer utilizing  similar fermentation time, same number of folds, and similar final proof time. We reshaped to boules (round), and after 30 minutes of rest, we shaped the boules into batards. The four different dough formulas had individual preferments, varying in how often it was fed and the amount used in the final dough.

These different preferments result in using different ranges of hydration, amount of salt and amount of yeast.

1) One-Feed Stiff ,50%  means the stiff levain was fed once( yesterday), rested overnight, and added to the final dough (today) for a bake. 50% of stiff levain was added to final dough formula.

2) Two -Feed Liquid, 50%   means the liquid levain was fed twice yesterday  (once in the morning/once in the afternoon), rested overnight, and added to the final dough (today) for a bake. 50% of liquid levain was added to final dough formula.

3) Two-Feed Stiff, 70% means the stiff levain was fed twice yesterday  (once in the morning/once in the afternoon), rested overnight, and added to the final dough (today) for a bake. 70% means 70% of stiff levain was added to final dough formula.

4) Two-Feed Stiff, 40% means the stiff levain was fed twice yesterday (once in the am/once in the pm), rested overnight, and added to final dough (today) for a bake. 40% means 40% of stiff levain was added to final dough formula.

Each of us would have the opportunity to pre-shape, shape, score, and bake 5 (five) loaves of each type of bread formula. That’s a lot of practice time in shaping a batard.

Art2Day2-3

Notice the active fermentation process inside the dough

Art2Day2

Dividing and weighing dough prior to preshape 

Art2Day2dropbox-5

Miyuki instructs proper slashing with razor blade 

Art2Day2dropbox-8

 Transferring loaves from the couch to the deck oven

Art2Day2

Nice blistering from the acidity 

We started pre-shaping with the One-Feed Stiff and worked out way to the fourth formula. Then, we shaped each form into a batard, working our way to through the formulas. After resting for an hour, we began the scoring, loading, and baking. This is the beauty of taking a workshop!  Having the hands-on experience of pre-shaping, shaping, scoring, baking and then, seeing the results (not to mention tasting!) is an invaluable lesson.

Art2Day2-7

We learned how to perpetuate a starter, both liquid and stiff.  Also, we discussed  converting a liquid starter into a stiff starter and vice versa. For busy travelers like myself, I learned how to make a “dry” a liquid starter and replenish into a liquid starter upon  arrival at the destination.

The four formulas we worked on today were a combination of levain and instant dry yeast. It’s possible to bake these breads without using baker’s or commercial yeast. Increasing fermentation time and final proof times well as maintaining proper Desired Dough Temperature (DDT) are critical in the success of baking bread formulas without  baker’s yeast. For the sake of time, I believe we used wild yeast and IDY to speed up the process so that we can bake breads today. However, to develop an even more dramatic flavor, these breads can be proofed or retarded overnight in the refrigerator.

EVALUATION OF END PRODUCTS:

It was interesting to see the subtle nuances made in the flavors of the bread based on the preferments. The flavor of the One-Feed, Stiff Levain, 50%  had strong acid tones, whereas the Two-feed, liquid levain, 50%  produced milder flavor. Feeding the starter more will decrease the acidity of the preferment.

Art2Day2-4

 Comparing the aroma and flavor of each formula  

The Two-Feed, 70% Stiff Levain offered more acidity due to the presence of more alcohol producing stronger flavors compared to the Two-Feed, 40% Stiff levain. Using more leaven in the final dough will add more complexity to the taste of the final product.

Evidently, the frequency of feeding the starter  has more impact on bread flavor than the amount of levain added to the final dough mix. Also, the use of liquid versus firm starter makes a difference in the balance of lactic/acetic flavor in the finished product.  The firm starter will be more acidic.

Art2Day2dropbox-23

 Two seconds of steam makes all the difference

Baking Sourdough, Levain and Wild Yeast, Day 1

Art1Day1-2

 Creating a sourdough culture, Day 1

Welcome to my second week at SFBI!  This week’s workshop is Baking Sourdough, Levain, and Wild Yeast, formerly known as Artisan II. Last week’s class was a whirlwind and I’m still trying to digest what I learned from Mac’s lectures as well as the skills training with the baguette formula. So buckle up, and let’s get going!

INSTRUCTOR

Miyuki Togi is the instructor for this week’s course.  She has been with SFBI for eight years as a bread, viennoiserie, and pastry instructor. Previously, she was a production manager for Thorough Bread and the Pastry Bakery, which the SFBI interns bake for.

Prior to joining SFBI, Miyuki graduated summa cum laude from Johnson & Wales University in Providence, Rhode Island, with a Bachelor’s degree in Culinary Arts and an Associate degree in Baking and Pastry Arts. She also studied at the DCT Swiss Hotel Management School in Switzerland. Throughout her school years, Miyuki staged at restaurants in Providence, RI, and Boston, MA. An impressive resume!

There were sixteen students in class with 4 students at each table.  There is plenty of room for everyone to write notes during demonstrations, take pictures and videos (for personal use only), move around and commiserate with other students in the class, as well as participate in the end-of-day evaluation. Sixteen students is the perfect class size!

Several professional bakers came from distant places such as the Philippines, St. Kitts, Brazil, Canada and Antarctica (yes, you heard right). Serious home bakers came from California, Idaho and as far as Australia. There were six of us from last week’s Systematic Approach to Bread course who stayed for this week’s sourdough course. I am surprised to see so many amateur/enthusiastic home bread bakers enrolled in these intensive classes.

THE CURRICULUM

Each morning begins with a classroom lecture at 7:00 am, providing in-depth instruction in the baking process and the science of baking breads. This is followed by hands-on skills training and an intensive production. Each day includes discussing the baking process, producing the results and evaluating the end product. Miyuki is a very organized teacher. From the beginning, she is very clear on how she wants you to move so you develop good habits.

In the photo below, she explains how to transfer bread dough from the couche onto the oven loader using a wooden long peel. Her movements are clean and deliberate. It’s a joy to watch her move – she is graceful and adept with her hands.

Art1Day1-6

Graceful Miyuki 

LECTURE:

The morning began with a thorough review of last week’s class ( Systemic Approach to Breads).  Those of us in last week’s class were thrilled to have the review. So much information was packed in five days that hearing it again definitely helped us retain it. It’s also beneficial hearing the same information from different instructors since they have different experiences and teaching styles. The quality of instruction is definitely a hallmark of SFBI: very knowledgeable, thorough, and professional. I have taken courses in the past where I was sorely disappointed (and quite frankly, ripped off) because instructors didn’t take their job seriously and/or lacked the knowledge to teach others, resulting in loss of time, money and in the end, I didn’t learn anything new.

As a review, Day 1 focuses on the 4 main ingredients and the role it plays in the characteristics of the dough; the mixing process as well as the role of autolyze, mixing time, and how dough temperature affect the fermentation activity; and the fermentation process which was discussed in greater detail.

Miyuki highlights the importance of how the length of the first fermentation will give the dough strength. Also known as the bulk fermentation, she explains how the quantity of the dough (mass effect) promotes fermentation activity. For the home baker, the ideal amount of dough to bake is at least 2 kg. Evidently, baking a 1 kg dough will lack the strength or the acidity that a 2kg dough offers. Also, the use of preferments will add strength as well as flavor to the dough.

Starter Tips

After this thorough review, we made a smooth transition to the sourdough process. Flour and water are the main ingredients to cultivate a sourdough culture.  Raisins and grapes have been used to add to the growth of the culture. I have read that of all the fruit juices available, pineapple juice seems to be the ideal additive towards growing a culture. I first learned to start a sourdough culture by using bread flour, rye flour, organic yogurt (because it contains live cultures) and raisins which after all are just dried grapes. The skin of the grape is where the microorganisms are found and conducive to start a culture for breads. I have used other combinations of just water, whole wheat flour and bread flour. Ultimately, the important things to remember in creating your own starter is to keep containers and utensils sterile. Also, once you begin to feed and maintain the starter, keep it away from commercial yeast.

In a recent experience of teaching a friend the basic steps of baking bread, I soon learned that she was experimenting with using fresh cut apples along with whole wheat flour, water, and honey to create her mixture which was added to her vegan muffin dough mix. Boy, was she far along the learning curve of the basics in bread baking! She began to experiment with this recipe after tasting breads that did not upset her stomach. She was following a recipe that used  left over residuals from making sake (fermented wine made of rice, yeast, and mostly water).

While many experiment with different ingredients to start a culture, the vital conditions to the growth of micro-organisms are water, oxygen, and nutrients found in flour. Whole grains like rye and whole wheat are typically used since it has extra food source for the bacteria.

As far as bakers boasting that the starters are “100 years old” is rarely the case. It’s really a myth. A starter that is propagated in one location and brought to another location will ultimately change its yeast/bacteria composition based on the new environmental conditions.  The ambient temperature, water content, flour used and how often it is fed will affect its composition. Ultimately, the new environment and flour will determine a unique profile for the starter.

We discussed how to start a sourdough culture, how to feed a culture, and how to maintain the process. The baking process and use of baker’s percentage was also explained.  Today, each table started a sourdough culture using water and flours (rye and bread flour).

Culture, Starter, Levain 

The combination of water and flour will give birth to microorganisms (wild yeast and bacteria strains) which will become active enough to  generate fermentation in ideal conditions. Within a week of feeding this culture, it will come alive which will become the seed or “starter” for future use. The starter is perpetuated by feeding twice a day. The amount of starter is increased so there is enough “levain” or “leaven” to ferment the final dough, and some set aside to perpetuate the culture for future use.


Art1Day1-3

 Warming the cultures by the oven

Whole grains which are rich in nutrients (sugars) for the yeast, are typically used in starting a culture. The warm temperatures radiating from the ovens provided a nice breeding ground for growth of wild yeast and good bacteria. Think food (wild yeast in air and flour), water and oxygen.

I read bread books often and pick up something new. Just as I learn something from each bake, there is something to glean from instructors talking about the same topic. I’d like to share with you some facts I learned this week which was news to me or slightly different from readings or conversations I’ve had with other bread heads. Just some information to think about and how it may affect your current practice.

Did you know?

  • The desired dough temperature for yeasted breads to be the most active to produce gas is 74-76F. For sourdoughs,the wild yeasts are bit slow moving so to stay active, the ideal temperature range is between 78-80F.
  • Diastatic malt powder is sprouted barley. It contains amylase, the enzyme that breaks down complex sugars into simple sugars which is food for the yeast. Adding malt will increase this enzymatic activity. Bakers will add malt powder for color and fermentation. Supposedly, 5% of malt can be added with the flour and water to propagate a culture. More sugar for the stronger strains of wild yeast to survive on Day 1.
  • The by-products of fermentation include carbon dioxide + organic acids + alcohol. Gas is produced right away during the bulk fermentation while the acids and alcohol are produced later, in 1-1.5 hrs. Gas production happens again during the final proof.
  • Preferred wheat for artisan breads: Winter/Hard/ Red

SKILLS TRAINING / HANDS-ON EXPERIENCE:

Miyuki began the didactic portion of the morning class by demonstrating how to start a sourdough culture, while explaining the use of whole grains flour, higher hydration, and how ideal warmer temperatures are conducive to giving life to a culture.

Art1Day1

Day 1 

 Miyuki guided us in making a sourdough/yeasted batard.  After reviewing Artisan I, we convened downstairs in front of the ovens as Miyuki demonstrated the mixing process.

During our hands-on experience, we measured water temperature while considering the room temperature, flour temperature, and friction factor, to achieve the desired dough temperature (DDT). The mixer was filled with water, followed by the dry ingredients and liquid levain. Miyuki discussed in detail the mixing process.

The bread’s characteristics depend greatly on the handing of the dough. Therefore, a large chunk of time is dedicated to dividing, pre-shaping, shaping, oven loading, scoring and baking.


Art1Day1-7

Proper scoring in a baguette

The rest of the afternoon, we measured dry ingredients for the next day’s bake.

EVALUATION OF END PRODUCT:

Art1Day1-11

Irregular and open crumb 

The yeasted sourdough batard is  high in hydration in order to achieve  a bigger and more open crumb. Like the baguettes we made last week, the flavor is sweet and the aroma is light. However, today’s use of levain provided more flavor – a gentle tang from the low acidity.

Art1Day1-13


Systematic Approach to Breads, Day 5

Artisan1,Day5-18

Baking in a Home Oven! Day # 5

This is the question that’s been in all the home bakers’ mind this week:  Is it possible to reproduce the same crust and color at home as in a professional steam injected deck oven?  Yes. But how? Wait for it….

On our last day, we finished discussing about preferments. The lecture involved discussing the taste of the different preferments as well as baker’s percentages using preferments.

To put theory to the test, Mac guided us in mixing 3 “improved mix” baguette formulas using three different preferments including poolish, sponge and preferment dough. The fourth baguette formula, called the Hand Mix, is similar to the “short mix” which we discussed in detail  on Day 2.  The Hand Mix dough bulked for 3 hours including several “stretch and folds”  to help strengthen the dough,  and later,  shaped into mini-batards and focaccia.

Artisan1Day5

Hand mixing the dough

Since we made too much bread yesterday, we waited to bake the egg braid formula today.  We painted  the braids with an egg wash, and added toppings such as poppy, pearlized sugar or sesame seeds before baking them.

The last day was spent mostly mixing four dough formulas, baking five different bread formulas, and and six different shapes: three-braided egg bread, mini-batards, focaccia, Epi. Fougasse, and Batards.

Hands -On Experience:

Artisan1,Day5-23

 Hot batards coming out of a home oven.  Nice color and oven spring!


Artisan1,Day5-6

 Mini batards resting before the bake

 All week, we’ve been walking around a home oven that’s positioned right in front of the elaborate manual loading deck ovens and next to the instructor’s working bench. Today, it’s plugged into an electrical socket, and will be the center of attraction. While the mini batards were resting during the final proof, the home oven was preheated for about an hour at 500F. As you can see, two firebricks were placed inside the oven to increase insulation and mass for heat retention. This concept is similar in a wood fire oven. The ideal wood fire oven has good insulation and mass to retain heat in order to cook food for a longer period of time. That’s another blog post!

A pan containing metal balls (more heat retention) was placed on the bottom of the oven. A perforated pie pan was added on top of this pan and filled with ice immediately after loading the oven. This will create steam in the first several minutes, adding moisture to the dough, thus delaying the formation of a crust, so that a rise in volume can occur. This rise in volume is called oven spring.

Artisan1,Day5-6

 Mini batards resting before the bake

The mini batards baked in the home oven are very similar in the caramelization of crust and oven spring as the deck oven.  The class was impressed! At home, I currently bake with one stone on the bottom and employ the same technique with a pan with rocks, adding water for steam at the beginning of the bake. Yet, I haven’t had the same results as today’s demonstration.  However, I get a better oven spring and Maillard Reaction (a chemical process that produces the dark colorization or in this case, the caramelization of crust) using a dutch oven pot. I will have to try the dual thick fire bricks in my home oven.

Artisan1,Day5-21

Hot batards out of the deck oven with steam injection. Very similar!

Artisan1Day5-10

Irregular holes 


Artisan1,Day5-19

 Focaccia made out of a Hand Mix Baguette formula


Artisan1,Day5-15

 Sleeping batards


Artisan1,Day5-12

Fougasse shapes


Artisan1,Day5-9

 Epi cut from a shaped baguette

Artisan1,Day5-2

 Toppings of poppy, sesame seeds, or sugar


Artisan1,Day5-5

My favorite! 

Egg braid

In the last half hour of class, we returned to the classroom to gather our thoughts and wrap up any questions. It was a pleasant surprise for Michel Suas, owner and founder of SFBI,  to join us while class certifications were handed out by Mac.

In a nutshell, it was week of gaining much knowledge and understanding the systematic approach to bread baking. The name of the course says it all! Mac McConnell is a talented artisan baker as well as an effective instructor in guiding the class through the entire bread baking process, answering our questions, and providing useful information from his personal experience for both the professional baker and home baker. Thank you Mac!

Art1Day1cdropbox


The classroom setting has been an incredible experience for me, since I’m a visual learner. With the personal instruction from Mac, I am able to focus on technique and skills to form a baguette. Hands-on experience in bread baking is essential since touch and feel is a major part of the process. All your senses are involved in a hands-on training. The repetition of shaping baguettes each day taught my hands the muscle memory needed for recall. You don’t get this from reading a bread book or watching a YouTube video.

Many of the formulas used in the classroom are similar to those in Michel Suas’ Advanced Pastry and Bread. The book and course notebook from the class will be a wonderful resource when we return to our home kitchen or work place.  I took copious notes, photographs and drawings to help me when I am home on my own.

When I was deciding which bread course to take, I thought that this course may have been too basic, since I have learned much from baking on my own and reading many bread books. After finding out that bread bakers take the class  as review and not having baked baguettes before, I decided to take Systematic Approach to Bread and so glad I did!   It was a very thorough review for me and still gained more knowledge than when I started. I learned how to properly shape a baguette, learned techniques when baking with whole grains, and gained more muscle memory from repetition and hands-on practice.  I improved and refined my current skills and came away with plenty of  bread formulas to play with. It was wonderful to meet other home bakers and share experiences, good and the not so good. I also met  professionals in the food service industry wanting to expand their repertoire  – it is amazing  how this introductory class that offers basic knowledge and skills can transform their future.

Artisan1Day5-5

Taking this class has been one of the most exciting experiences in my life. I love to learn as much as I can about a particular subject and immerse myself with passion. I am a visual learner and learn best by doing. I enjoyed learning from others who are experienced, talented and passionate in their field.  SFBI has satisfied my thirst for learning and exceeded my expectations of a teaching institution.

I have chatted with beginner bakers on bread forums who are interested in taking such course but don’t feel they are up to par with other bakers. Listen up. Don’t feel intimidated by professionals who have baking experience. They may be pastry chefs or food chefs, but they are also here to learn. Otherwise, they wouldn’t be here in the first place. Remember, it’s only flour. It’s fun with lots of good camaraderie and cheer.  My advice to you, who have been wanting to take this class someday, is just do it. You will wish you had done it sooner.

My class had varying degrees of bread baking experience. The class lecture is organized and structured so that it is easy to follow and understand. There are no requirements for this class other than the desire to learn. Reviewing baker’s percentage would be helpful since it’s a new concept for beginners to understand. Otherwise, just bring an open mind, a notebook to take notes and comfortable shoes for standing. It’s a fast pace environment in the bakery area, so maybe a pair of running or crosstrainer shoes will do for the more sedentary.


Classphoto

Systemic Approach to Bread Course Graduates!

If at all possible and by all means, come to SFBI and experience learning in a hands-on environment. Learning next to an experienced baker is the most ideal situation to learn to bake bread. I highly recommend it!

Next week, it’s a 5-day course on Sourdough, Levain and Wild Yeast. Who’s with me?!

Systematic Approach to Breads, Day 4

Artisan1,Day4-25


Enriched & Whole Grains, Day 4

We took a break from baguettes today. It was flurry of activities mixing a bounty of five breads: 1) Pan, 2) Egg,  3)Whole Wheat, 4) Multigrain and 5) Rye.  These different breads gave us the experience of different mixing times for improved and intensive mixes. So, it was a break from shaping baguettes, but we still used similar mixing times and fermentation. During the lecture,  Mac discussed using different ingredients and different types of flour (bread flour vs cake vs pastry) in baking.

Before reading about  today’s bread experience, take a peek at today’s special treat, fruit jewels or pate fruit,  from the pastry students next door. Reminds me of Lin and Chris Horst’s Fruit Jewels of Maui!

Artisan1Day4-28

We were introduced  to preferment which is a mixture of water, flour, yeast, +/- salt that is prepared the night before. The mixture is allowed to ferment overnight and develop gluten, and is added to the final mix the next day. The reasons for using a preferment is to add flavor, dough strength (extensibility) and shelf life. Preferments offer big rewards for the little effort and planning it takes to prepare it the night before.

The different types of preferment include sourdough (levain), poolish, sponge, biga and prefermented dough (aka pate fermentee, or old dough).

Can you guess which preferment this is?

The main point is use a preferment whenever possible.  It’s cheap. It’s easy. It brings all the benefits of fermentation to the final dough ( CO2, alcohol, organic acids). And if you have only access to poor quality flour, the preferment can help strengthen the dough.

When to add preferments?  You usually add them after autolyze, but liquid levains can be added before autolyze due to their high water content. But if the water temperature is cold, wait until after the autolyze to avoid delaying the fermentation process.

Artisan1,Day4-4

One final note when using preferments. Don’t forget to take into consideration the preferment temperature when calculating the desired dough temperature (DDT).

Enriched breads like Egg and Pan have sugar and butter which contributes not only to flavor but also shelf life.

Artisan1,Day4-9

Both formulas have a high percentage of butter which requires adding the fat once there is some gluten development.  If the fat is added sooner, it coats the protein strands and delays the gluten development. Sugar is considered hydroscopic, meaning it loves water. Adding large amounts of sugar in the beginning of mixing may rob the flour (protein) of proper hydration, thus slowing the development of gluten from the start.

Hands-On Training:

Artisan1,Day4-11

PAN BREAD

The enriched dough were formed into boules (round shaped). It is commonly shaped into cylinder form or two small boules, which we did today. The two small pieces together in a loaf pan create a more uniformed shaped when baked. The pan bread turned out beautiful – soft and buttery, yet firm enough for toast or sandwiches. We noted most of the  loaves had a nice caramelized color crust, while a few loaves had an albino look…one group of students forgot to mix in the milk solids, which made their loaves lighter in color. Needless to say, it was still edible and quite delicious. Better than any store bought bread!

Artisan1Day4-4


Artisan1Day4-20

Since the enriched breads have a longer shelf life, I chose to freeze a loaf and brought it home with me. To store bread in the freezer, simply wrap a completely cooled loaf with aluminum foil, and then wrap it again with plastic wrap. Two weeks later, I unwrapped the plastic wrap and warmed up the foil-wrapped bread in 350F for 25-30 mins. It tasted fresh and the interior crumb was soft and still moist! Definitely a keeper.

EGG BREAD

Egg bread can be considered a poor man’s brioche since a brioche has five times the amount of butter.

Osmotolerant yeast is used rather than the usual yeast when there is a large amount of sugar in the formula. Sugar and eggs inhibit its activity, so more yeast is required. Sugar is introduced in slow increments.  During the gluten window test, the dough is thin and plasticky.

The photo below shows Mac rolling out preshaped cylinders into strands. The strands will be used to make 3-braid breads. We each had the opportunity to make 3-braid doughs which we retarded overnight in the refrigerator. The following day, we painted an egg wash before baking.

Artisan1Day4-17


Artisan1Day4-18

 
Artisan1Day4-16


Artisan1Day4-19

I especially liked the Egg Braid sprinkled with sugar!

Egg braid

WHOLE WHEAT BREAD

The Whole Wheat bread uses an autolyze method after incorporating the flours, water and preferment. An autolyze allows the flours to absorb the water and become fully hydrated. This rest period hydrates the proteins and can form a stronger gluten structure. This formula requires a high hydration to support a medium-soft dough consistency.  Whole wheat flour is super rich in bran that has much fiber and cellulose, absorbing a lot of water. After the autolyze, the rest of the ingredients are mixed.

Artisan1,Day4-13

Mixing time is shorter to avoid overworking and tearing the delicate and fragile gluten. The use of a preferment helps reinforce gluten development. The fermentation activity is increased in the presence of bran since it contains minerals which are food for the yeast. Therefore, a small amount of yeast is used.
Artisan1Day4-24

Flour is sifted on top of the whole wheat boule before its bake to protect the dough from burning due to honey. The flour is sifted before the boules are scored or slashed with a lame. The Whole Wheat breads are baked at lower temperatures for a longer period of time and vented.  The venting is needed to get rid of the extra moisture absorbed by the bran in the whole wheat flour.

Rye-3

MULTI-GRAIN

Like preferments, the seeds (or soakers) are also prepared the night before. They are soaked in cold water overnight. Seeds that are incorporated into the dough are toasted and allowed to cool before mixing with dough.

Artisan1,Day4-8

Pre-shape into round forms.

Artisan1Day4-5


Mac demonstrates shaping the multi-grain dough, from a pre-shaped round form into a batard (oval loaf).

Artisan1Day4-7


Transferring multi-grain loaves into the deck oven.

Artisan1Day4-26


Artisan1Day4-31

RYE

Like whole wheat flours, rye flour requires a high hydration to maintain a medium-soft consistency dough. The fibers in the kernel of a rye berry love to absorb water. Also, rye contains pentosan which loves to absorb a lot of water. Pentosan contributes in the ability of rye dough to retain gases during fermentation but is also responsible for the stickiness, making rye dough difficult to work with. Your hands need to be wet to work with this dough. It is important during mixing time to protect the fragile dough from tearing and overmixing.

Similar to whole wheat, rye is rich in minerals that act as a food source for the yeast. Therefore, a small amount of yeast is needed as well as a shortened fermentation time. Since it has a low tolerance for fermentation, rye dough can easily overproof if not watched carefully. The use of preferment  in this formula helps strengthen the weak gluten structure of rye dough.

Artisan1Day4-3

We each divided and preshaped rye dough which we placed right into wicker baskets. After resting on the baskets, it was flipped over directly onto the deck oven. Using a lame (razor blade on a stick), each dough was scored in a 90-degree angle or chevron design.

Like whole wheat, rye bread is baked at a lower temperatures for a longer period of time to allow moisture to leave the dough.

Artisan1Day4-12


Artisan1Day4-13

JUDGMENT DAY

Loved them all! I really enjoyed the experience of using different flours (whole wheat and rye) and preferments, understanding the characteristics of each flour while adjusting the mix and fermentation times in order to create a nice loaf with volume, aroma and flavor.

Artisan1Day4-32


Artisan1Day4-33

Systematic Approach to Bread, Day 3

Artisan1Day3-2  

Perfecting the Baguette Shape, Day # 3

It’s hump day!  We are almost half way done.  The days are long and lots of information is cramming into my brain. I quit drinking coffee three months ago so I am getting my sugar fix instead from a jalousie that miraculously appeared on the table. Sweet surrender. High on sugar and being at SFBI!


Artisan1,Day3-16


Today was an informative day learning about flour, the main ingredient of bread.

It is day #3 of continuing to master a baguette shape. After divvying up the massive amount of dough between four tables, we each divided our own strip of dough and weighed for each baguette. Another day to practice dividing, pre-shaping, and shaping the elusive baguette. Practice makes perfect. Making 3 types of dough formulas results in each student shaping 15 baguette doughs today. This is the beauty of taking a bread course where you can focus completely on the baking process with guidance and personal instruction.

Today, we used a straight improved mix baguette. Straight means using baker’s or commercial yeast. The Improved Mix process is defined by mixing dough to a soft medium consistency with a fermentation time that offers an open, regular crumb with a complex flavor and aroma.  There are different combinations: Two bread flours, one with autolyze, and a third with high-gluten flour.

Artisan1Day3

 Hello Jyoti + Gustavo! My colleagues hard at work!

The hands-on experience focused on mixing one dough with a high-gluten flour, a second dough formula with a low-protein bread flour and a third dough formula with low-protein bread flour with autolyze. The idea is to examine the bread characteristics based on the quantity of protein as well as the difference in implementing an autolyze.  Autolyze describes the process of mixing flour and water without adding yeast and salt. The hydrated flour mixture is left alone for 20-30 minutes, which jump starts the gluten development by hydrating the flour.

Artisan1,Day3-5

As a quick review,  flour is made up of  starch and protein. Water is needed to break down protein (amino acids). Probably the only fact I remember from Organic Chemistry!  Protein equals gluten. It is water that starts the enzymatic activity when added to flour. Enzymes are responsible for breaking down starch to sugar, which feeds the yeast to promote the process of fermentation (F).

                                           F

Flour + water + yeast  ====> carbon dioxide + alcohol + organic  acids

The byproducts of fermentation are carbon dioxide, alcohol and organic acids. Carbon dioxide creates volume, or structure, in the loaf. Both alcohol and organic acids are responsible for flavor and aroma. Note that carbon dioxide production occurs in the first hour of fermentation. The alcohol and acids are produced  later in the fermentation process. Therefore, it’s imperative to prolong the first fermentation as long as possible to ensure the complex flavors and aroma have time to develop.

In the bread baking process, there are two areas of focus. One is the understanding of mixing and fermentation. The other is the manual aspect of the baking process where your hands are touching the dough and are directly involved in the outcome of the finished product, which includes, mixing (if done by hand),  folding and stretching  (in the bulk fermentation), dividing, pre-shaping, shaping, and scoring.

As a whole, the entire week of intense training and production is quite overwhelming. Each day gets easier because of recall and repetition. Each day, I make an effort of slowing the time, focusing my mind on just one aspect of skills training.

Artisan1,Day3

My work station! 

Hands-On Training:

Today, I focused on the importance of properly dividing and pre-shaping—the keys to properly shaping dough. The first photo below shows Mac in the beginning stages of pre-shaping. He divided the dough, cutting firmly and deliberately as close to one piece of dough, without damaging the integrity of the fermented dough. The reason we divide in equal portions is so the loaves are baked evenly and consistently.

The mass of dough is flipped over a floured surface. The soft skin is now down. A strip of dough is cut from the bulk mass, creating a square-like form. Any small pieces of dough are placed in the center. Notice how he forms a wider base at the bottom part of the dough. Pre-shaping is a way to remove large-size air pockets that may have formed during the first fermentation.  It is also an opportunity to rescue a flabby dough by creating a tighter form. Conversely, an over worked dough needs a slack form prior to resting. The shaping of the dough remains a challenge!

Artisan1Day4-4

 Preshape: de-gas

The next step is to de-gas the dough. It  is best to flatten your hand and apply light pressure throughout. Don’t use fingers to dimple or poke. Do not damage the integrity of  the fermented dough, and waste the time it took to develop. After bubbles or gas are removed, the next step is to preshape. Fold the dough farthest away one third into the middle and press down at the same time to create surface tension on the new edge. Repeat the fold two more times until a cylinder form is created, the pre-shape to the baguette (see below). The dough rests with seam side down. The preshape is done swiftly and with light hands.

Artisan1Day4-2

 Preshape into cylinder form

After a short rest to allow the dough to relax, the preshaped dough is ready to be formed into a baguette.  The cylinder form is flipped over so that shaping starts with seam side up. Once again, de-gas with your flat palm and  apply pressure across the cylinder to get rid of any bubbles and smooth the surface (see below). When degassing, the flattened cylinder is also being  slightly lengthened.

Degassing

 Shape into a  baguette

Now we are ready to form a shape. Take the dough edge furthest away and fold into the middle. Pressing down and pushing away simultaneously creates slight tension on the dough edge. Turn the cylinder form 90 degrees and repeat. The second fold will over the first.

Artisan1Day3-12

 The first fold

The second fold overlaps the first fold.  Again, apply slight pressure by pressing down across the cylinder which creates a slight indentation across.


Artisan1Day3-14

The second fold

The last step is folding the dough once more before hand rolling into a traditional baguette length. Moving from right to left, fold the form in half with your left hand and seal the edge by pressing with the right heel of the palm of your right had. The dough may make a squeegee  sound. That’s just bubbles popping due to fermentation.

Shape-5


Sealing the third fold

With one hand on the center , begin to roll the dough with hand with your fingers and the heel of your palm in contact with surface. Add the other hand and continue to roll, applying even pressure across the shape as it lengthens (see below). Shoulder are relaxed and moving in rhythm with the hands. Easier said than done!  The actually rolling or elongating of the cylinder form  makes a difference in making the bread look like a baguette or a shape resembling a baseball bat.

Artisan1Day3-16


Artisan1Day3-17


I have attached a link from the SFBI website showing Mac demonstrate baguette shaping. I wish I had known about this video sooner to help review before class time. Needless to say, treat yourself to a bread class at SFBI.  Nothing beats  hands-on experience and personal instruction.

http://www.sfbi.com/shaping-baguettes.html

Final Proof: sleeping baguettes

Artisan1Day3-21


Artisan1,Day3-9

As on the first day, we baked a straight improved dough mix (using bread flour)  in order to compare the same formula with a high-gluten flour. The differences in taste and crumb was subtle. The high-gluten flour formula provided a chewier baguette. The dough was softer and easier to mix the improved dough autolyzed for 30 minutes.

Artisan1,Day3-19

Artisan1,Day3-13

Artisan1,Day3-23

 Loot from today!

Systematic Approach to Bread, Day 2


Art1Day2-14

 Deconstructing a Baguette Formula, Day # 2

After a tiresome, yet exhilirating first day, the Tuesday morning’s 7:00 am start came quickly! After enjoying a morning cup of tea and a slice of apple tart made by the pastry students next door, we started with a morning lecture on gluten development.

Today’s lecture was eye opening for me. I consider myself an enthusiastic advanced baker. I give credit to bread bakers/authors who guide me through their recipes/formulas so I can successfully produce a loaf of bread with complex flavors and aroma. As a student baker at SFBI, I am empowered by learning to bake bread with specific characteristics based on mixing and fermentation time.

Day #2 involved perfecting the shape of a baguette—a simple, yet elusive shape to master. Today’s goal was to understand the relationship between mixing and fermentation through demonstration and lecture.  Using a baguette formula, Mac introduced three dough mixes :  1) short mix, 2) intensive mix, and 3) improved mix. The formula (or recipe) ranged in hydration and yeast with similar amounts of salt and malt. The mixing time and  fermentation time varied, resulting in differences in the finished product. Altering the mixing and fermentation time best demonstrated the differences in the characteristics of each baguette, i.e. crust color, volume, score, aroma/flavor, crumb structure, and color.

In detail, I describe the length of mixing time in a mixer, the length of bulk fermentation time, and final proof time. Accordingly, the amount of yeast will vary, based on the fermentation time.

The Short Mix Dough: The mixing time is short, approximately 5-6 minutes at Speed 1. The low speed is used to incorporate the ingredients evenly and begin to develop a soft dough. The short mix time creates a dough that is weak and underdeveloped. To ensure gluten development and dough strength for shaping and proofing,  three (3) stretch and folds are employed  during a long fermentation of 3 hours.  The increased hydration makes the dough extensible (stronger). Gluten development occurs during the 3 hours of bulk fermentation and 45 minutes of  final proof. The long fermentation time requires a small amount of yeast at 0.3%.

The Intensive Mix Dough: The mixing time is even longer, producing a stiffer dough; 5 minutes at Speed 1  to blend the ingredients together and 5 minutes at Speed 2 to develop the gluten. The time in the mixer brings strength to the dough and gluten development, requiring no folds.  There is less hydration in the dough and more yeast. Bulk fermentation is approximately 20 minutes and further gluten development occurs at the end when the bread is shaped, during the final two-hour proof

The Improved Mix Dough: The mixing time is longer than the short mix, but shorter than the intensive mix ; approximately 5 minutes at Speed 1, and 3 minutes at Speed 2 (this is equivalent to Speed 4-5 in a  Kitchen Aid home mixer). The mixing time produces a medium-soft dough, a nice compromise between the two mixes but not quite fully developed. Therefore, one stretch and fold technique is needed for gluten development during a shorter fermentation time of 1.5 hours. Gluten development occurs almost equally during fermentation time and a final proof of 1 hour.  The hydration is slightly decreased and the shorter fermentation time requires a slight increase in yeast.

That evening, I reread chapter 3 of  Michel Suas’ Advanced Pastry and Bread on the Short Mix, Intensive Mix and Improved Mix, and how these mixes evolved in history and culture. The Short Mix is similar to how bread was made in a home kitchen, before the advent of the mixer, when all breads were mixed by hand. The dough was mixed by hand, followed by a long fermentation time. There were no distractions back in the day; only time on their hands.  The Intensive Mix describes how bread baking time was decreased using a mixer. Bakeries invested in mixers so the baking process could be shortened and improve the life of the baker. Needless to say, the flavor and appearance of bread suffered! Bread became bland in flavor and white in color. Yes, like Wonder Bread! To improve flavor and maintain a favorable baking schedule, bakeries modified the mix and came up with a hybrid or Improved Mix, which decreased mixing time to avoid over-oxidizing the dough and increasing fermentation time for a more developed flavor. Voila!


Day 1-3-46


EFFECT ON THE FINAL PRODUCT:

What does this all mean? A picture is worth a thousand words. I will illustrate the results with a photo of the baguette and briefly describe  the flavor/aroma, taste, color, and crumb structure.

SHORT MIX BAGUETTE:

Day 1-3-89

The large, open, irregular crumb size (holes or alveoli) , or honeycomb look and the creamy texture of the crumb is due to the high hydration and long fermentation time.  The flavor tastes sweet with a light aroma.  The yellow, creamy color of the crumb indicates the dough was not over mixed or over oxidized. Volume is slightly smaller (baguette crumb on the right). This mix is typically made by the weekend home baker who has plenty of time for the long fermentation producing a loaf of bread with a complex flavor.


INTENSIVE MIX BAGUETTE:

Day 1-3-86

Notice the crumb structure is tighter, small grained, and white in color. The dough was over-oxidized from the long mixing time (baguette crumb on the left). The size of the baguette is bigger, but the flavor is quite bland. The short fermentation time does not allow the acids and alcohol to develop, which are responsible for shelf life, aroma and flavor.


Comparisons of Intensive vs. Improved vs Short Mix Crumb:

Day 1-3-85

Intensive Mix (left), Improved Mix (middle), Short Mix (right)


Unlike the short and improved mix, the intensive mix’s crumb structure is small, tight and uniform. This is due to the lower hydration as well as the long gluten links developed during the longer mixing time of ten minutes. This mix is best suited for recipes that contain butter, eggs and sugar and require dough with strength and integrity. The tight structure and fully-developed dough can hold these ingredients,  requiring  less hydration and more yeast to help with a short fermentation.  Needless to say, this is a perfect mix for a baker who prefers a voluminous baguette with a tighter crumb for “Dagwood” hero sandwich. Who needs a flavored bread with a mile high meat and cheese sandwich?


IMPROVED MIX BAGUETTE:

Day 1-3-87

Like the short mix, the crumb is creamy, with large holes or alveoli due to the fermentation time and high hydration (baguette crumb on the right). The flavor is sweet with a slightly larger size. This particular mix is the “Goldilocks” of the three; it is “just right”! The amount of time to prepare the mix is slightly less than the short mix without sacrificing the good flavor and crumb structure. This is an ideal baguette recipe for the busy baker who does not have time to bulk dough for 3 hours.

My personal favorite is  the short mix baguette:

Day 1-3-89


Ultimately, when my week is busy with working and picking my daughter up from field hockey practice, I’m not sure I have the energy to bake bread. If I did, I would choose the improved mix, where I can mix a few minutes longer and add extra stretch and folds in a shorter fermentation without compromising the flavor while producing a nicely textured bread with gaping holes to fill with soft butter or ragu sauce.

Didactic / Hands-On Training:

One of the wonderful benefits of a hands-on training course is the ability to feel the dough, ask questions and get immediate feedback.  The day before class, a group of students is assigned to measure the dry ingredients. Today, we watched each dough be incorporated and had the opportunity to watch the gluten develop during the mixing process.  Mac guides us every step of the way. He fields all questions any of the students ask. I’m not sure how many students have used the gluten window test, but I never did. I quickly realized how easy it is to incorporate the tactile test to determine how much longer to mix the dough to ensure proper gluten development. It is always a good idea to perform a gluten window test between Speed 1 and Speed 2, and again after Speed 2. Remember, recipes are a guide. All mixers are not alike and batch sizes vary. Flour varies from bag to bag and temperatures are not constant.  Therefore, mixing time varies from one kitchen to another, one bakery to another, and one baker to another.

We mixed all three doughs types (short, improved and intensive) in the morning. In the afternoon, after bulk fermentation, we continued to practice the following processes by hand:  1) dividing, 2)  pre-shaping, 3) shaping, 4) oven loading, 5) scoring, and  5)baking.

 DIFFERENCES  IN DOUGH CONSISTENCY:

Short mix dough is mixed at Speed 1, The consistency of the dough is soft and tacky. The goal is to completely hydrate the dry ingredients with the water, ensuring the mix is incorporated uniformly.

Improved mix dough is mixed at Speed 1 for 5 mins, and Speed 2 for approximately 3 mins. The dough is more resistant after being pulled; there is a feeling of tautness. After the second mix on Speed 2, it’s time to check the gluten window. Grab a small putty of dough and pull it in all directions with your fingers. The idea is to get the dough pulled as thin as possible without tearing, assessing for color and how it tears. A dough with strength slowly tears in a jagged fashion.

Intensive mix dough is mixed at Speed 1 for 5 mins and Speed 2 for another 5 minutes or so. These are approximate times; there are no fixed times. Therefore, it’s a good idea to check for gluten window after 4 minutes on Speed 2. The tear is straighter because the gluten is more organized in a long, thin structure. You want a fuller developed dough.  A straight tear is good!

Check out the pictures of the window pane test on the short, improved and intensive mix doughs in The Advanced Pastry and Bread book by Michel Suas. The color photographs on pages 65-66 best illustrate the differences in the dough consistency and what to look for when testing for gluten development.

SHAPING A BAGUETTE:

On Day #2, I am surprised how much easier it is to shape and roll out the baguette dough. Practice makes perfect. When I say “easier”, I didn’t have to remind myself to breathe while lengthening the dough. This time,  I could focus on making sure the bottom of my palms and finger tips were touching the floured surface as I’m rolling while lengthening the dough into a snake-like piece.  I even practiced shaping while closing my eyes and taking slow breathes as I do in yoga as I begin to roll, relaxing my hands and shoulders while focusing on breathing. Sometimes that worked. After 5 rolls, my baguette doughs were still different lengths. Some pointy. Some rounded. One shorter than the other. One was shaped like a boa constrictor that just swallowed a mouse! That was not intentional, by the way. Needless to say, I felt more relaxed than Day 1.


Art1Day2-10

EVALUATION AFTER BAKE:

After the three bakes, Mac separated the three mixes comparing and contrasting the physical differences: crust and crumb structure, color of the crumb, as well as the aroma and flavor of each bite. He did not individually critique each bread, but we were welcome to chat with him if we needed feedback.  I did show Mac two of my “best”  baguettes to find ways to improve. He said I needed to overlap my slashes and cut even deeper. Sounds like a plan. Personally, I felt more relaxed shaping the doughs. I tried not to over-think while rolling the dough, which results in more symmetry.

Art1Day2-13


FOR TOMORROW:

We measured a batch of dry ingredients to compare bread characteristics using different flours (bread flour, bread flour with autolyze, high-protein flour).

Art1Day2-11


Systematic Approach to Bread, Day 1

SFBI

Introduction to the Baking Process, Day #1

Welcome to my first week at SFBI! This week’s course is  Systemic Approach to Breads, formerly known as Artisan I. This is considered the introductory course to the art and science of bread baking. It is a class geared to the professionals, educators, and enthusiasts. This is a week-long class that offers a theoretical and practical approach to baking bread: the bread baking process from mixing ingredients to baking the bread with an in-depth understanding between mixing and fermentation through demonstration and explanation.

 THE INSTRUCTOR

Today’s class began at 7:30 am. We gathered around the dining area for a breakfast of  coffee/tea,  fruit danishes and bostock slices prepared  by SFBI students. What a treat!

We convened on the second floor lecture room  and met our instructor, Mac McConnell. Mac is a graduate of the Professional Training program at SFBI.  He is a mechanical engineer, but switched careers shortly after graduating to be a bread baker. He was the head baker at Berkshire Mountain Bakery in Massachusettes, working with highly hydrated whole grain sourdough breads, before returning to teach at SFBI as a full-time instructor. Mac is very knowledgeable, articulate, responsive to questions and comments, and clearly a master baker. The preciseness of  a trained engineer translates nicely into the bread baking industry.

day1h

Mac’s Baguettes

STUDENTS:

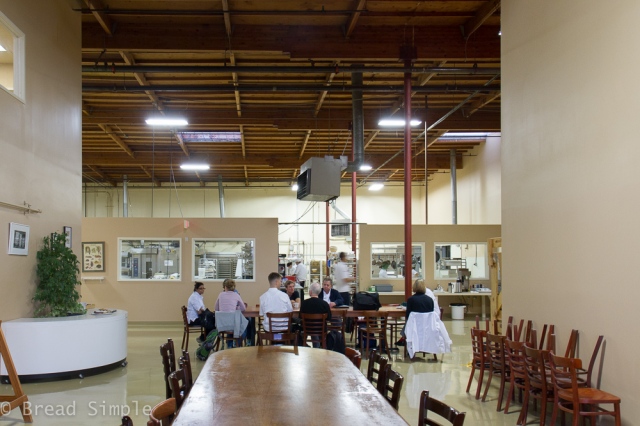
The classroom consists of 17 students of  different background  from all over the world. One third of the group are culinary professionals, such as professional chefs or owners  who want to incorporate breads into their menus. The other 1/3 are professional bread bakers who want to expand their expertise or pastry bakers who want to  learn bread skills. The rest, like me, are serious bread bakers/enthusiasts who bake passionately for family, friends and simply for the pleasure of baking.  The class is comprised of 50% women and 50% men. Students came from far away places like Tel Aviv, Nairobi, St. Kitts, Brazil, and in the US:  Idaho, California, Pennsylvania, Texas, Oregon, and Virginia/Maui. Varied backgrounds ranged from a current bakery owner wanting to expand his offerings, a restaurant owner wanting to offer breads from the wood fire oven, several who are in the transition phase between careers, to the  home baker enthusiasts and the wannabes. The photo below is the break area where breakfast pastries and lunch is served. The background area is the pastry workspace where fresh pastries and cakes are created. Lucky for us.

Art1Day1dropbox

LECTURE:

After the student introductions stating occupation and experience with bread, Mac gave an overview of the curriculum for the next five days.  The day is divided into a formal classroom lecture first thing in the morning, followed by didactic or hands-on training afterwards.

In today’s lecture, he briefly discussed three mixes : Short Mix, Improved Mix, and Intensive Mix, highlighting the difference in the processes and the effects on the baked product based on dough handling, gluten development,  and fermentation time. In order to fully focus on the three mixes, the plan is to work on one shape—the traditional baguette. This is bittersweet news to me. I was glad to know that I would learn to shape and score a traditional  baguette properly, but it is a new endeavor, making it the most challenging for me! And probably for the rest of the class.

Today, the focus is on the Improved Mix. Using a mixer,  the mixing time is approximately 5 minutes on Speed 1 and 3 minutes on Speed 2.  During the first (bulk) fermentation, a stretch and fold technique  is used to further improve gluten development.

We each received lecture notes in a binder for note-taking. Mac elaborated on  major topics such as the

1) Overview of the mixing process,
2) Baking terminology
3) The four main ingredients and their functions
4) Mixing, including the Desired Dough Temperature formula
5) Fermentation
5) Dough handling,
6) Overview of Baker’s Math, or Percentages.

The lecture covered primarily covered Chapters 3-5 in the book Advanced Bread and Pastry, authored by Michel Suas, the founder of SFBI.  I found the lecture to be an important review. It was a nice mix of information from the voice of an experienced master baker  along with enough scientific detail that appeased the science nerds like me. Plus, the lecture was a time for us to ask any burning questions, clarify any misconceptions and get immediate feedback or comments from a master baker. I was worried that I would be bored with the lecture since I’ve done plenty of reading and learning on my own. Needless to say, I’m glad to be in this class- there is so much to learn this week as well as from others and especially in a classroom setting when there’s plenty of time for hands-on and personal instruction. For those who do not have the time to attend courses at SFBI, I highly recommend Advanced Bread and Pastry.

DIDACTIC /HANDS-ON TRAINING:

The sit-down lecture was followed by a demonstration of Mac guiding us through the baking process.  First, he measured wet and dry ingredients, separately. Malt, yeast and salt were combined with the flour.   He added water to the spiral mixer, followed by the dry mixture of ingredients. The mixer was set to Speed 1 for 5 minutes simply to incorporate ingredients (stage 1). After 4 minutes, he performed a window pane test to show how underdeveloped the dough was, noting how easily the dough tears. The dough mixed for another minute and then he increased the speed to 2 for 3  minutes for gluten development (stage 2). It was helpful to get a feel of the dough after the incorporation stage and then compare the feel of the dough with gluten development by doing a window pane test.

Art1Day1dropbox-2

day1

Before this course, I have only had the opportunity to make baguettes once, using Jeffrey Hamelman’s Baguettes with Poolish.  I used my Kitchen Aid home mixer to incorporate my ingredients at Speed “Stir”, the level before 1. Once the ingredients were incorporated, I would increase the speed to the next level, Speed 1 as the recipe calls for. I was rather surprised to see how much faster the mixer was turning for the stage 2 of the mixing process. According to Mac, the Kitchen home mixer should be mixing at “Level 4-5”.  Definitely an Aha! moment here.

After watching Mac demonstrate the mixing of “straight” dough which means yeasted dough, baked the same day we broke into groups of 4 . Each table got a slab of fermented dough that had bulked for one hour. Between lectures, we stretched and folded twice.

Shortly after lunch, we dumped the dough on the floured surface and began:

1) Dividing
2) Pre-shaping,
3) Shaping
4) Oven Loading
5) Scoring,
6) Baking

Dividing dough into squares, at 350 grams each, was deliberate and clean using a metal scraper. Preshaping took place in a rectangle form while slightly degassing (to remove small pockets of air). After some rest time to allow the dough to relax, we shaped the 5 rectangle doughs into baguette shapes. This was the most challenging for most of us.  During the hands-on, Mac walked around the room ,providing us guidance through the process and answering questions.

day1c

After a final rest, the baguettes were loaded onto the loader and individually scored by a lame. They were pushed into the deck ovens and baked at 450 degrees F for 20-25 minutes. The ovens were steamed prior to load, and then steamed immediately after, simply by a push of a button.

The hands-on experience of shaping a traditional baguette was a highlight for me. Due to the size of my home oven, I am limited to baking demi-baguettes, which is half the size of what are making this week. I suppose I can make one baguette at a time, diagonally on the baking stone.

END OF DAY EVALUATION:

It was a great learning experience to hear Mac’s assessment of each the student’s baguettes according to the shape and score.  He gave the group his interpretation of what may have happened during the shaping process to achieve the results we were seeing. For example, being heavy-handed in the middle of the dough during the lengthening process results in uneven width on one end of the baguette. That was a constructive criticism I received for my baguette that looked like a baseball bat. Go San Francisco Giants!! The most common constructive criticism he pointed out was the angle of scoring. Much of the scoring was slashed too much in an angle. The preferred scoring is straight down the baguette which overlapping slashes.

day1f

Discussion of Crumb Structure + Score

day1e

My baguettes

day1g

Crumb Structure of Improved Mix

TOMORROW’S AGENDA:

After the evaluation, each table was assigned one of tomorrow’s three  bread formulas, measuring the dry ingredients for tomorrow’s class.  So far, the class has been a trifecta of success for bread baking:  lecture, hands-on experience, and guidance/critique from the instructor.

Whew! What an incredible first day. As my husband said to me when I walked into the apartment, “you must have been in hog heaven!”  I certainly was. Like a piglet rolling in mud, in this case, flour!

Heading out to SFBI

Tartine


I have been baking breads seriously in the last six months. After taking the artisan bread course in 2010, I continued to bake regularly on the weekends, mostly in the cooler months. With my new-found baking skills, I gained confidence in trying out recipes other than I learned from the course. I have since managed to collect twenty-some bread books being guided by bakers like Jeffrey Hamelman, Richard Miscovich, Ken Forkish, Chad Robertson, and Dan Lepard. I’ve been playing around with different hydrations of sourdoughs, baking in dutch oven pots and cloche baking containers, adding herbs and dried fruits to dough, and baking breads with hydrations from 56-90%.

It’s been four years since my last hands-on experience. I know how much faster I learn in a hands-on setting.  So, when my husband asked how I’d like to celebrate my birthday this year (it’s a big deal since it’s my 50th!) I decided that taking a bread course would be a wonderful way to celebrate my birthday and have a dream come true!

Eight months ago while attending the MacWorld Conference in Moscone Center, I found my way to the San Francisco Baking Institute (SFBI) to pick up some bread tools.  I took a quick tour of the facility and noticed they did not spare any expense – they had classrooms with top-of-the-line equipment.  Reading great online reviews from former students of the high-quality instructors and informative curriculum helped me decide that this would be a great fit for my baking needs.

So I’m writing this on the plane as we’re heading to San Francisco to make my bread dreams come true. Happy Birthday to me!! Thanks Babe.

I envision my experience in the next few weeks at SFBI as taking a “Berlitz Class of Breads”, a total immersion course that offers a blitzkrieg of information in a short amount of time. The sheer repetition of baking bread over and over again will provide valuable “bench time” while under the watchful eye of  a master baker.

So this week I am enrolled in the Artisan Bread: Systemic Approach to Bread, training Monday through Friday from 7- 3 pm. I plan to journal my experience, providing a narrative description each day so I can use this as a reference myself when I am back in my kitchen.  Come join me in my next bread adventure.

Stay tuned!


How I Started Baking Bread at Home

BouleTurkish

ART IN FOOD

Food plays a major role in our lives, nourishing the important relationships around us. Food can shape where and how often we spend time with family and friends, as well as determine where we spend our vacation time. Many friendships blossom for the sake of sharing similar taste in food or for the love of food. This rings true in my life, and it serves as a passionate activity for me. Consider it functional, edible art.

Growing up in the Filipino culture, rice has always been a main staple of my diet. It wasn’t until I reached adulthood that potatoes, pasta and bread entered my realm of food choices. I always thought of bread as a side dish or a snack; certainly not the sustenance of life as I think of it today. I didn’t have decent bread until my early 20’s. Marvelous Market in Bethesda comes to mind, as  does fresh-baked bread from local bakeries in my travels to Europe and the restaurants of New York City. Nothing local or close to my home, unless you count Whole Foods or Panera. Traveling and meeting people from different cultures led to my desire to broaden my taste buds and learn to cook with different flavors. After all, one of the best ways to learn about a culture and its history is through their cuisine. As a self-taught cook and life learner, I decided to embark on learning to bake bread at home.

VIRTUAL BREAD FRIENDS

None of the foodie friends I knew baked bread at home. It wasn’t until my (ahem) mid-forties that I wanted to demystify what baking bread was all about. In the last few years, new friendships and acquaintances have emerged from bread-related connections.

Rewind back to 2008 when I was introduced to the idea of bread baking at home! I was intrigued by conversations I had with a  work colleague, Alan who talked about making his own bread at home. He talked about spending a day with a friend who showed him the skills and technique of sourdough. His friend had spent a week learning to bake bread at the Culinary Institute of America (CIA) which was taught by Daniel Leader, baker and author of  Bread Alone. After prodding Al with questions and interest, he was kind enough to bring me a home-baked sourdough baguette. I was hooked. The fact that not many people around me knew much about bread baking intrigued me even more. It wasn’t long till I bought my first bread book.

Not knowing anyone locally who is as passionate about food as I am, I found enthusiastic cooks and bread bakers like myself on the web, through forums like The Fresh Loaf, Pizza Making.com, Wok Wednesdays and Artisan Bread Bakers on Facebook. The Bread Baker’s Apprentice was the first bread book I owned (I do read cookbooks like one reads a novel—just for the sheer pleasure of it).  The aesthetically pleasing cover of a Korean girl embracing bread caught my attention. The bread book was written in English, but it may as well have been in Korean! I could not seem to follow the baking process or picture how the dough was supposed to look or feel, despite the many descriptive adjectives. Call it intimidation or whatever you like, but the book sat on my shelf for about a year. Here’s a photo of the first bread I baked in late 2009. This is solid proof that anyone can bake bread by following instructions. It looked like bread, I didn’t say it was pretty. Or tasty. Ha! FirstBread

THE ARTISAN BREAD SCHOOL

I am a visual learner and enjoy delving into interests by learning as much as I can from reading as well as first-hand in a classroom setting. After much internet research, I found weekend courses for bread baking at King Arthur Education Center in VT, as well as SFBI in CA. As luck would have it, I found a 5-day artisan bread course in Washington State, one of my favorite food destinations! Enrolling at the Artisan Bread School in October 2010 was the best decision I made in learning the basics of bread baking. The hands-on experience gave me confidence to try new bread recipes. Attending a bread course definitely sped up the learning process. I was drawn to making my own bread at home for several reasons. First I wanted to fill the kitchen with the freshly baked bread aroma. Also, the idea of controlling what I ate (unprocessed foods) appealed to me. In addition, playing with dough using my bare hands satisfied the need for a creative outlet.

2010 Graduates of Artisan Bread School

Artisan Bread School

Sourdoughs baked in wood fire oven at Artisan Bread School, 2010

Sourdoughs baked in wood fire oven, Artisan Bread School, Hains House, 2010

My Bread Baker Heros

When I finished the artisan bread course, I became a seasonal home baker; practicing my new baking skills, honing my dough-handling techniques and experimenting with bread formulas from different authors. Jeffrey Hamelman, Richard Miscovich, Ken Forkish and Chad Robertson became my new bread teachers. I spent the cooler months baking in my home oven and the warmer months reading and talking about bread. Here are photos of the breads I baked after taking the bread course. Not too shabby for a seasonal baker, and it was quite delicious!

THE LE PANYOL WOOD-FIRED OVEN

After spending a week at Hains House Bed and Breakfast where the Artisan Bread School was hosted, I was convinced that owning a wood-fired oven was in my family’s future. The quality of foods cooked and breads baked in the oven was impressive. The higher temperatures of the wood-fired oven produced rich caramelization in the foods I just couldn’t get from my mediocre home oven. The copper clad, white clay (“terre blanche”) Le Panyol wood-fired oven, weighing a mere 2400 pounds required a lift gate. It took an hour to level the oven on its 300 pound stand. Since this beautiful oven didn’t come with an instruction manual, I learned by reading through wood-fired oven books and hands-on experience. Getting used to the extreme high heat (up to 800 degrees) was both challenging and rewarding. WFO

PIZZA, AND MORE PIZZA

In the first year of learning how to use the wood-fired oven, pizzas were spewing out of the copper dragon’s mouth faster than I could make them. Pizza became a popular item on our family dinner menu. Then I got pizza on the brain in late 2012. After taking the family to NYC and joining Scott Weiner on his infamous Pizza Tour, I spent a January morning in Brooklyn with Giulio Adriani, owner and pizza chef of Forcella, learning the basics of Neapolitan pizza. The one-on-one training with Giulio was invaluable in learning to make pizza dough using 00 flour as well as managing a hot oven to cook Neapolitan pizza in 60-90 seconds. In May and August, I returned to NYC for a 10-day pizza training course at Don Antonio’s with Roberto and Georgia Caporuscio and became certified as a pizzaiola (pizza maker). Yes, the overpriced training was overkill, but baking Neapolitan pizza with Italian flour in a Neapolitan oven couldn’t be more authentic. If you are wondering what I learned in the 10-day training, it was just that making a great pizza takes lots of practice. The secret is using the right equipment (fork  or spiral mixer), the right oven (wood fire oven) and the freshest ingredients. Neapolitan pizza In March 2013, I attended the Pizza Expo in Las Vegas to learn from other pizza masters like Tony Gemignani, owner of Tony’s Pizza Napoletana in North Beach, SF. His two-day demo proved to be invaluable for a visual learner like me. I continued to perfect baking Neapolitan pizzas in my backyard with dreams of sharing the authentic taste of Neapolitan pizzas with the local community. Selling my oven so that I could re-invest in a mobile oven did not happen. My original idea of vending pizzas in the farmer’s market on Saturdays rather than spending quality time with my family, made me rethink my strategy of sharing my passion for Neapolitan pizzas. I continued to bake pizza, throwing pizza parties for friends and family just so I could make the dough and fire up the oven!

NYC Pizza Marathon 2013 with Gabriel Bonci

On a recent trip to Rome, I visited Pizzarium and learn about Gabriel Bonci, a bread baker, culinary chef, and better known as a pizza TV celebrity. I had just met Tom Edwards, owner of MozzaPi, pizzaiolo (pizza maker), artisan bread baker, and woodwork artist,  in Tuscany the week before, who put Bonci on my radar after he shared his experience with Bonci’s workshop and Roman pizza. So fast forward to October 18-21, 2013. It was my NYC Weekend Pizza Marathon with Gabriel Bonci. It was great fun meeting Elsia Menduni, co-author of the Pizza Book and fellow pizzahead, Ted Rosenberg from Pizza Making Forum during Bonci’s demonstration at Eataly, in the Flatiron District. We experienced a two-hour demo and tastings of his pizzas paired nicely with Italian wines. The following day, we headed over to Paulie Gee’s in Brooklyn for an amazing lunch by Bonci sponsored by Paulie Gee and Katie Parla, food blogger and writer of  Walking Rome.  It was a three-hour event of watching Bonci do his magic of baking the Roman pizzas in the wood fire oven. It was also fun to meet Jeremy Shapiro, another bread head and blogger of Stirthepots.com. The following evening was the NYCWFF, La Sagra Pizza.  I got to enjoy different slices from Co. Pizza, Nicoletta’s, Motorino and Forcella. Thanks to Jeanette Catena, owner and pizza chef of Luna Pizzeria in NJ, who is the business development director of Orlando Foods, sole distributor of Caputo Flour. I love their flour!  The weekend culminated at Sullivan Street Bakery where I attended a workshop with Bonci, learning to make his pizza style. I don’t speak  Italian and Bonci doesn’t speak any English, but baking next to the pizza master was what I needed to learn the craft. That night, it was fun to meet the man responsible for revolutionizing bread baking, the no-knead technique, and owner of Sullivan Street Bakery, Jim Lahey. One of my favorite pictures taken in the early mornings at Sulliven Street Bakery.   untitled-19 For a detailed post of  my NYC Pizza Marathon with the Michelangelo of pizza himself, Gabriel Bonci, check out www.pizzastalker.blogspot.com Since early this year, I decided to spend more time baking bread using the Le Panyol oven, which is primarily a bread oven. I spent time collecting more bread books and studying them like textbooks to increase my knowledge on baking science and process. I found inspiration in several bread forums I joined through Facebook, especially Artisan Bread Bakers whose membership has grown to almost 1000. I jumpstarted my baking journey by taking a bread course. I have spent the last year or so regularly baking bread book recipes from baker/authors like Chad Robertson (Tartine), Richard Miscovich (In the Wood Fire Oven), Dan Lepard (The Handmade Loaf), Jeffrey Hammelman (Bread) and Ken Forkish (Flour, Water, Yeast and Salt). I have had several colleagues from work come to the house for a day’s lesson in baking different types of breads including pizza. Sharing my love for baking and teaching others that making GOOD bread at home is possible has been quite rewarding!

BREADHEADS ARE EVERYWHERE

The one thing I’ve learned in my bread making journey is how receptive and genuinely friendly bakers are! The people I’ve met through the bread connection are the friendliest bunch. An example is the wonderful camaraderie from connecting with others on the Artisan Bread Bakers Forum on Facebook whose members reside in all parts of the globe. If distance was not a deterrent, I think many of us would be meeting for a bakery tour or a bake-off in someone’s kitchen. Which is exactly what I did! This past March while in San Francisco to attend MacWorld, I had the wonderful opportunity to Joy Plummer, an amazing chef, baker, and mom extraordinaire. We met on the Artisan Bread Bakers Forum months prior and developed a bond over bread. It was that simple. We met at Nanking Restaurant and enjoyed a wonderful meal and passionate conversations about bread, family, life, and more about bread. Thank you, Joy,  for the wonderful fresh loaf of bread you brought me. While visiting my stepson at RISD, I had the pleasure of spending the day with fellow bread head and WFO owner, Ron Rathburn, who bakes up to 90 loaves of bread in a weekend in his hand-built wood fire oven in the backyard. Because of his expertise and willingness to share, I have learned to manage the heat in my wood-fired oven so I can bake up to a dozen loaves of sourdough breads. Thank you, Ron. Over the summer in Maui, I was introduced via email to a new baking friend who has her own micro bakery and lives part-time in Maui and California. We were so excited talking about bread and having found each other on a small island that she graciously loaned me her cloche baking pots to bake my sourdoughs in! While we haven’t met face-to-face yet, I feel connected to her because of the passion we share. Mahalo, Julie. So if I’m not baking or reading about bread, I love talking about bread with anyone who has a remote interest. An evening weekend stroll into William and Sonoma store led into an opportunity to bake my naturally leavened focaccias in their WOLF gas ovens. Amazing crisp crust with a tender crumb, filled with fruity olive oil. FocacciaWS

SAN FRANCISCO BAKING INSTITUTE (SFBI)

All of this has brought me to another new life adventure. A two-week training class at SFBI! I will blog about my experience each day, so stay tuned! SFBI